Ever wondered why concealer isn't cutting it for dark circles or redness? Some concerns need more than basic coverage. That's where color correctors come in.
Used right, they can transform your base. This guide explains what each color does, how to choose the right one, and how to apply it. Let's get your base makeup working smarter, not harder.
Color correctors are tinted makeup products designed to neutralize specific skin discolorations. They work on the principle of the color wheel—opposite colors cancel each other out. So, rather than layering foundation over blemishes or under-eye circles, correctors help balance the color first, making your foundation or concealer sit better and look more natural.
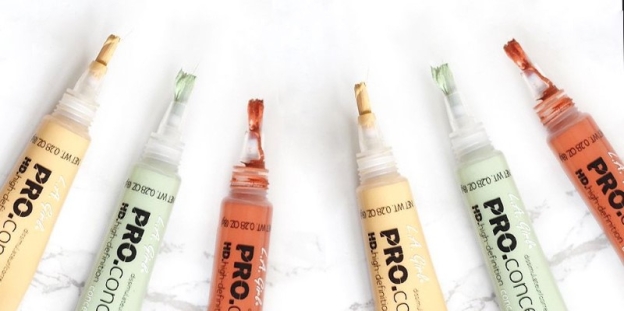
They're usually available in cream, stick, or liquid formulas and are applied before foundation or concealer. The most common shades include green, peach, orange, lavender, pink, and yellow, and each targets a different skin concern. But grabbing the right shade isn’t enough. The magic is in knowing where and how to use them.
Let’s break down what each corrector does and when to use it.
Green cancels out red. If you have rosacea, acne marks, or even a sunburn, this is your go-to. A light dab on red areas helps tone them down before foundation.
These are especially helpful for people with blue or purple under-eye circles. Peach works better for light to medium skin tones, while orange is ideal for medium to deep skin tones.
Pink correctors are great for bringing life to sallow or tired-looking skin. Use them to brighten areas like under the eyes or the corners of the mouth.
If your skin looks overly yellow or dull, a lavender corrector helps neutralize the tone and gives a fresh base.
Yellow correctors are ideal for masking mild purple or blue undertones, often seen in veins or mild under-eye circles.
The goal isn't to cover discoloration entirely with the corrector—to tone it down so that your concealer or foundation doesn't have to work as hard.

Most people either skip blending or overdo the product, which ruins the whole point. Here's a practical step-by-step:
Your correctors will only sit right if your skin is hydrated. Apply your moisturizer and eye cream first. A primer can also help if you want longer wear or need to smooth the texture.
Color correctors are highly pigmented. You don’t need to paint your face with them. Use a small brush, your fingertip, or a beauty sponge to apply a thin layer of product. If you can still see the discoloration slightly, that's okay.
Don't blend the corrector all over the place. Tap gently on the exact spot where you applied it to fade the edges, but keep the concentration. The goal is soft neutralization, not full coverage.
After blending the corrector, apply your foundation or concealer. Use a light hand and a patting motion. If you swipe or buff too hard, you'll move the corrector around. The product on top should cover, not erase, your correcting work.
A little translucent powder will lock everything in. If you're using powder foundation, you may be able to skip this step; however, cream or liquid products tend to shift without proper setting.
Correctors come in different forms: liquid, cream, and stick. Choosing the right one depends on your skin type and the specific area you're targeting.
If you’re layering, use liquids under liquids and creams under creams to avoid separation or pilling.
If you're looking for a lighter finish or more natural effect, you can sheer down your color corrector by mixing it with moisturizer or primer. This is especially helpful if you're using a thicker cream corrector and want it to look seamless on the skin.
Another tip: If you're dealing with multiple concerns, start with the most prominent one. For example, if you have both redness and under-eye circles, handle the redness first so it doesn’t distract from the more delicate area under the eyes.
Makeup isn’t just about hiding flaws—it’s about understanding what your skin needs and making thoughtful choices that let it look its best. Color correcting might seem like an extra step, but it can make a real difference in how your base makeup performs and looks throughout the day.
When you focus on neutralizing discoloration rather than piling on concealer or foundation, the result is more natural, less cakey, and easier to maintain. With a bit of practice, the correct shade, and proper technique, you can use correctors to subtly refine your skin tone and make the rest of your routine work more efficiently.